Here we will be sharing how to lock the scroll bar in Chrome. To know more, read on.
Quick Solution
- Locking the scroll in Google Chrome is no longer available in newer versions and is a default feature you can’t turn ON or OFF.
- In older versions of Chrome you could disable or enable it by browsing to chrome://flags and searching for the Scroll Anchoring option and enabling it.
- Enabling smooth scrolling is also a not available feature anymore and can only be done in older versions as Chrome does smooth scrolling automatically now
Google Chrome is one of the most popular browsers in the world. Although, some users complained about the high RAM usage and a few other annoying things.
Among them, one is related to the scroll bar or the scrolling feature.
If you have visited a website with ads, then you will come to see that even if you scroll down while the site is loading, you will be taken back to the top of the page when the site loads completely.
This is an annoying issue, to say the least. But is there a solution to this? Unfortunately, this is another ‘Yes and No’ question. Why?
Let us explain. You could actually lock the scrollbar from jumping out of nowhere in some older versions of Google Chrome. But with the latest versions, it is not possible anymore.
So, if you have an old version of Google Chrome, then you can lock the scroll bar in Chrome.
On the other hand, you cannot do anything about it, unfortunately. Still, you can proceed to check out the tutorials below to be sure whether your version of Google Chrome is eligible or not.
In addition, we have also provided some other fixes to many issues regarding the scroll bar in Chrome.
So, let’s jump right in…
How to Lock the Scroll Bar in Google Chrome
1. Enabling the ‘Scroll Anchoring’ option
UPDATE
This feature is not available anymore in newer Chrome versions, and is currently a default feature in the browser you can’t turn on or off, it’s always ON. You can see from the Unavailable tab that they stopped allowing it.
However, if you wish to see how to do it in older versions of Chrome – read below
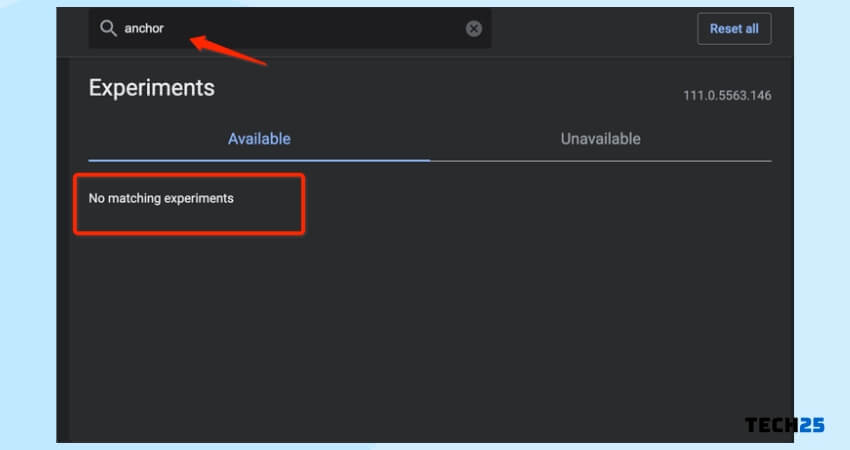
This is a method that worked. But unfortunately, it was available in older Google Chrome versions. So, if you have an older version of the Google Chrome browser, you can try this one. Here’s how…
Steps to Follow
- Launch the Google Chrome browser in your PC or Mac
- Next, visit this address- ‘chrome://flags’ (without the quote marks) on Chrome
- It will open some experimental settings
- Now, scroll down until you find the ‘Scroll Anchoring’ option there, you can even search for it
- At this point, you should click on the dropdown menu next to the ‘Scroll Anchoring’ option and select the ‘Enabled’ option
- Lastly, you can click on the ‘Relaunch Now’ button from the bottom of the screen or you can manually restart the Chrome browser
With this feature enabled, the scroll bar will not jump to any other place on the page all of a sudden. That means the scroll bar in Chrome is locked now.
2. Enabling ‘Overlay Scrollbars’ to fix scroll bar disappear
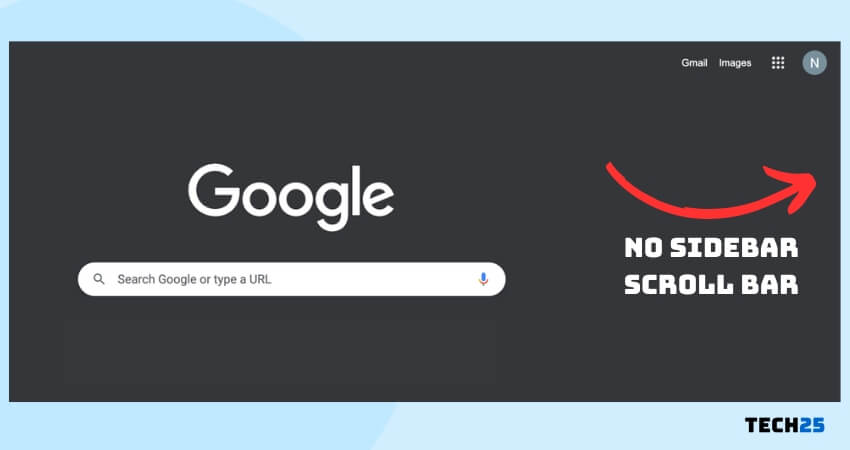
Another common issue with Google Chrome scrollbar is that it disappears sometimes. This is a very annoying bug of the browser. We can try to fix it by following the steps described below.
But remember that this option is not available in the latest versions of Google Chrome. So, if you have older versions of the browser, you can try this.
Steps to Follow
- Launch the Google Chrome browser in your PC or Mac
- Next, go to this address- ‘chrome://flags’ (without the quote marks) on Google Chrome
- It will bring out many experimental settings
- Now, find the ‘Overlay Scrollbars’ options by scrolling down or searching
- Next, you will have to select the ‘Enabled’ option from the dropdown menu that is next to the ‘Overlay Scrollbars’ option
- Last of all, you will have to restart the browser to activate the new setting
If you have done that the scroll bar will not disappear all of a sudden from now on.
3. Enabling the ‘Smooth Scrolling’ option
UPDATE
In newer versions of Google Chrome this feature is not available anymore to turn OFF or ON and Chrome does it by default.
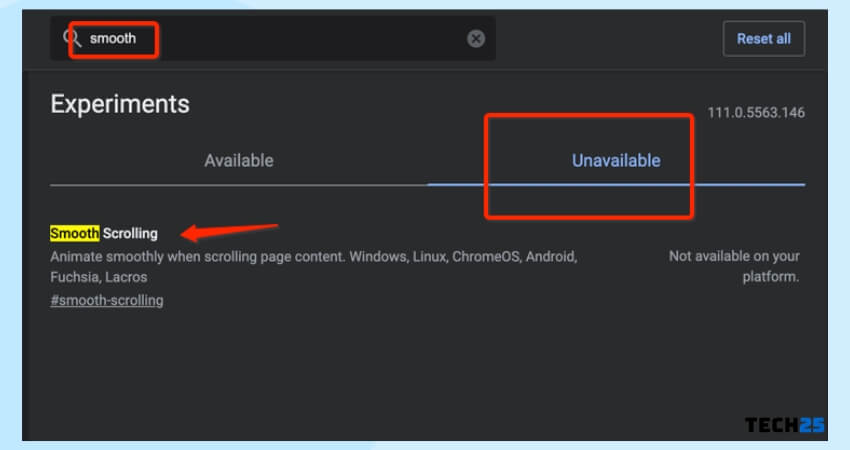
If you want to improve the scrolling experience in Google Chrome, there is an option for that as well. And luckily, it is available on the latest versions of Google Chrome.
Steps to Follow
- Launch the Google Chrome browser in your PC or Mac
- Next, go to this address- ‘chrome://flags’ (without the quote marks) on Google Chrome
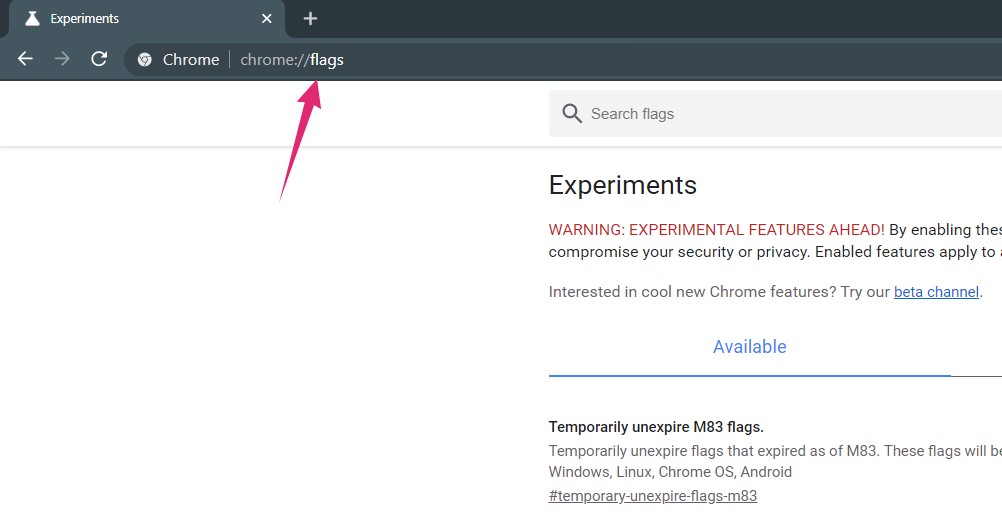
- In doing so, you will be taken to the experimental settings page of Chrome
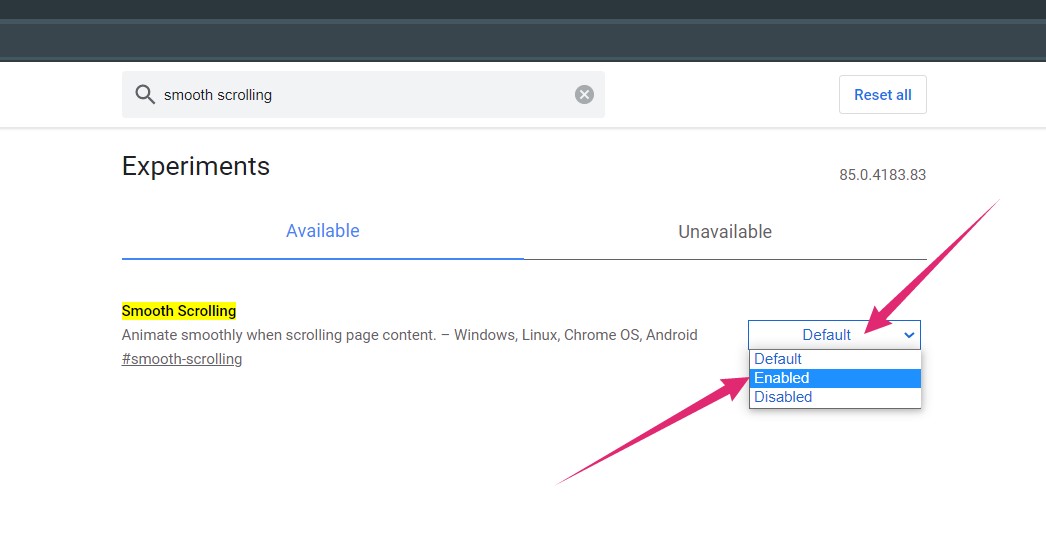
- Now, scroll down until you find the ‘Smooth Scrolling’ option
- Then, you have to enable it. To do that, click on the dropdown menu next to the option and select ‘Enabled’ from the options
- After all that, you will have to click on the ‘Relaunch’ button from the bottom of the page. That will restart the browser and the new settings will start working
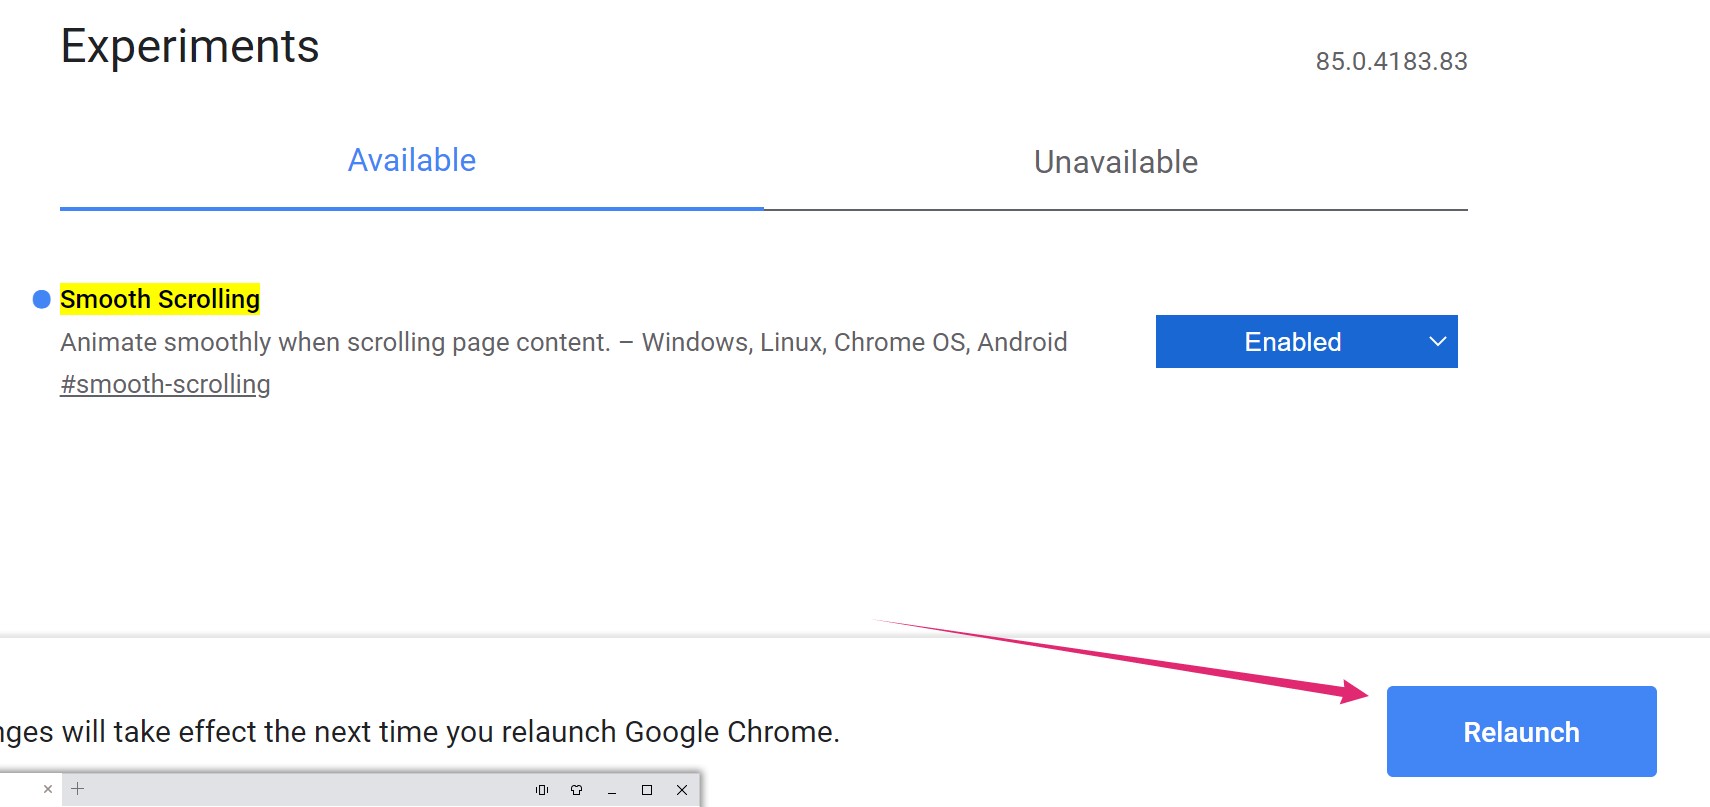
You can see that is shows in the Unavailable tab in the Experiments page in the browser.
5. Troubleshoot Google Chrome to fix any Scroll Bar related issues
It is known that the scroll bar in Google Chrome behaves abnormally from time to time. To fix the issues, you can try troubleshooting the browser following the steps below.
| Update Google Chrome | Enable Hardware Acceleration |
| Reset Google Chrome Settings |
Troubleshoot #1 Update Google Chrome
This is one of the most overlooked steps when trying to solve any issue related to Google Chrome. Google releases very regular updates to its most popular browser.
With those updates, they fix many bugs and adds new features. So, if you find that you have not updated Google Chrome in a while, you should update it as soon as possible.
Troubleshot #2 Enable Hardware Acceleration
Oftentimes, it is reported that enabling or disabling the ‘Hardware Acceleration’ in Google Chrome solves a lot of issues. Now, as we have said, the solution could be either enabling or disabling it.
So, if you have already enabled it, then you have to disable it and vice-versa. Here’s how to tweak the ‘Hardware Acceleration’ setting.
Steps to Follow
- Launch Google Chrome on your PC
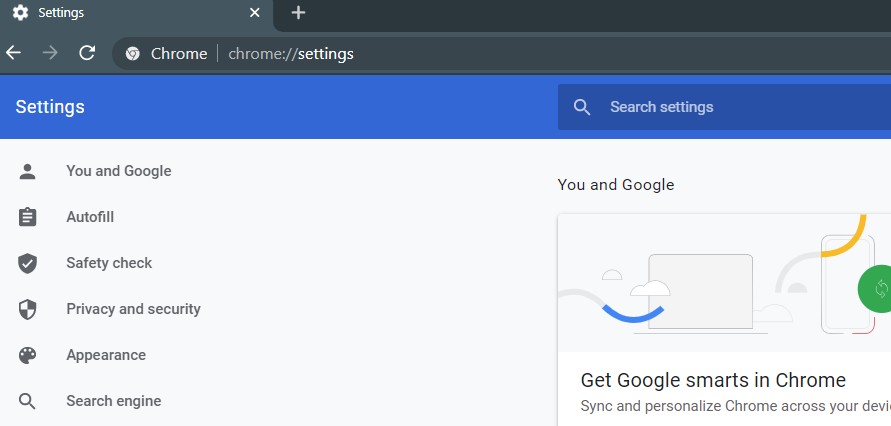
- Now, go to ‘chrome://settings/’ (without the quotations
- This will open the setting menu of Google Chrome
- Now, scroll down and find the ‘Advanced’ option from the left sidebar
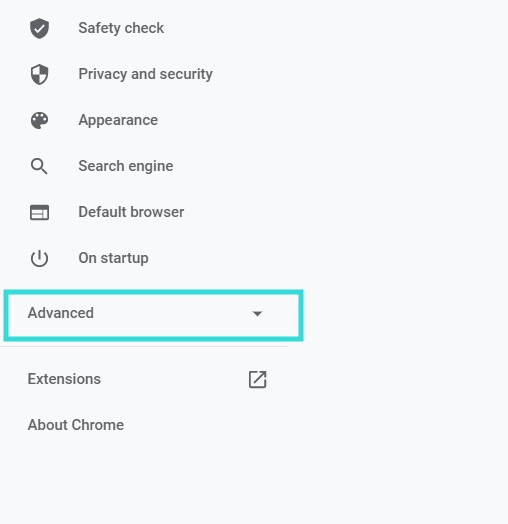
- Next, enable or disable the ‘Use hardware acceleration when available’ option from under the ‘System’ tab
- You have to click on the ‘Relaunch’ button after you have changed the settings
Troubleshot #3 Reset Google Chrome Settings
You can also try resetting all the settings to default in your Google Chrome browser. We will show you how to do that. But before you proceed, we should tell you this…
Disclaimer: If you reset Google Chrome, all the pages and tabs will return to the default state. Additionally, it will also clear cookies and temporary data. Plus, it will also disable extensions. So, you will have to enable them again.
Steps to Follow
- Launch the Google Chrome browser in your PC
- Now, click on the 3 dots on the top-right corner of the screen of Google Chrome
- Then click on the ‘Settings’ option
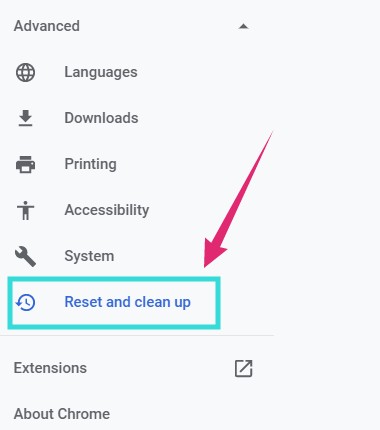
- After that, you have to click on the ‘Advanced’ option from the left sidebar

- It will open a new settings menu. Click on the ‘Reset and clean up’ option from there
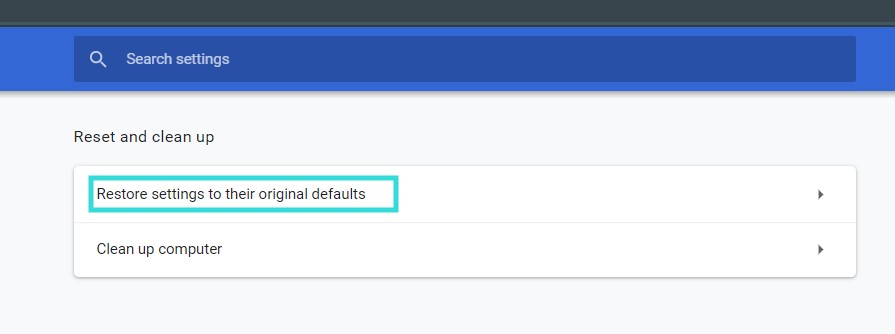
- Next, you will have to click on the ‘Restore settings to their original defaults’ from the main window
- In doing so, a warning message will appear. Simply, click on the ‘Reset Settings’ button
Last Words
If you have read our post above, then you should know how to lock the scroll bar in Chrome. Then again, if you are a new version of Google Chrome, you might not be able to fix the issue.
However, we have also shared a few more tips and tricks to fix issues with the scroll bar in Chrome. We hope this will help you solve any problems related to the scroll bar in Google Chrome.
Before we part our ways, you can read our post on 25 unbelievable facts about meteors. And, if you have any further queries or suggestions, you can let us know in the comment section below!
