How to screenshot on Gateway laptops or desktops? Do you want to know more about this topic? Then follow along.
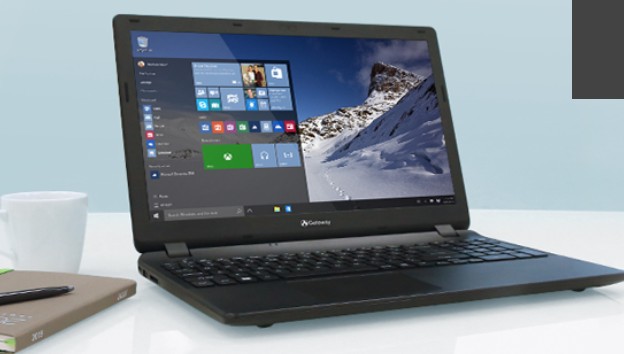
Gateway was one of the most popular brands that were offering computers, laptops, etc. back in the 90s. However, after decades of successful business, they were acquired by the famous Acer.
Since then, Gateway hasn’t released any products under the ‘Gateway’ branding. Interestingly, Acer has started to release new products under the ‘Gateway’ name brand since 2020.
They have released laptops and pre-built desktops. All of their products have the old Gateway logo. And, if you are a fan of that brand, then you will be glad to know that the product quality has improved to a greater extent.
So, you can go with Gateway if you want to. As a matter of fact, you might already own a Gateway laptop or desktop. And, you don’t know how to take screenshots on Gateway. If that is your case, then you have come to the right place.
So, let’s get to the good part…
Tutorial on How to Screenshot on Gateway Laptops/Computers
Most new Gateway laptops are coming with Windows 10. And, if you own an older version, then it still would come with Windows operating system. That means, if you know how to take a screenshot on Windows, then you will be able to take screenshots on your Gateway computer.
Lucky for you, there are a number of different methods that you can follow to take screenshots on Gateway. And we will explain a few of those methods in this section.
By the time you have read this post, you should be ready with the knowledge on how to take screenshots on your Gateway. Here we go…
Method #1 The Print Screen Method
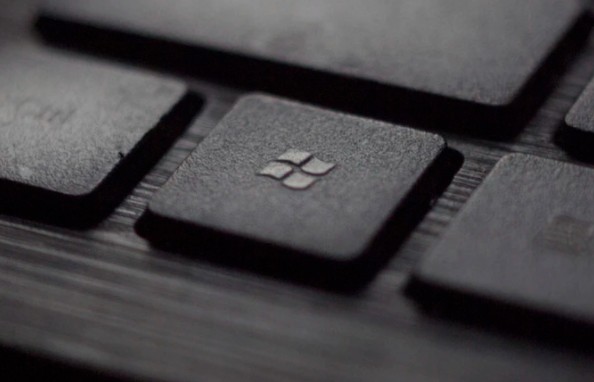
The first method would be the most popular one. In this method, you will not need any 3rd-party software. Rather, Windows has everything you will need for this method. Yes, we are talking about the ‘Print Screen’ key shortcut method of taking screenshots.
Remember, in this method, the entire screen will be captured. So, if you want to take a screenshot of a particular area of the screen, you will need to crop the image later. Now, let’s learn more about this process.
Steps to Follow
- So go to the page you want to take the screenshot of.
- Then, press the Print Screen key on your keyboard. On some keyboards, you might find this key as PrtScn or PS key. So press on that key while you are at the page or screen you want to take a screenshot of.
- At the moment, the screenshot will be saved on the clipboard. So, you can paste it on any picture editing program.
- For this, you can open the Paint or Paint 3D app on your Gateway PC. Now, paste the screenshot by pressing the CTRL+V shortcut keys at the same time. Or you can also manually click on the ‘Paste’ button from the top left corner of the screen on the Paint app.
- At this point, you can edit the screenshot. For instance, you can resize or crop, or add texts to it.
- Next, you need to save the image wherever you want to. To do this, simply click on the File option from the top left corner of the screen on the Paint app.
- After that, you will need to click on the ‘Save as’ option.
- In doing so, a few options will appear, you can click on the ‘JPEG’ option.
- Next, you will be able to choose the folder where you want to save the screenshot.
- Finally, click on the Save button on the windows explorer window, and the screenshot will be saved.
Now, go to the folder you have saved that screenshot and you will find it there.
Remember, you can also use the ‘CTRL + Print Screen’ shortcut key to take a screenshot the same way on Windows 7. After you have taken the screenshot, you will need to save it on apps like Paint or Paint 3D.
Method #2 Windows + Print Screen Method
You can see that you need to save the screenshot if you follow the previous method. But you might want to take a screenshot on your Gateway like your smartphone. That means you want to save the screenshot automatically on your PC. Luckily, it is possible to do that as well in Windows 10. Do you want to learn about this method? Then let’s go.
Steps to Follow
- First of all, go to the page or window or screen you want to take the screenshot of.
- Then press the ‘Windows key + PrtScn’ keys at the same time.
- In doing so, the screenshot of the entire screen will be saved automatically.
- You will find the screenshot on the ‘Pictures>Screenshots’ folder of your Gateway PC.
Reportedly, this method only works in Windows 10. You can obviously try this on other Windows versions as well.
Method #3 The Snipping Tool
Did you know that Windows already has a preloaded screenshot tool? This is known as the ‘Snipping Tool’. Ultimately, the Snipping Tool will be replaced by a new tool in Windows 10.
However, it is still available on older versions of Windows like Windows 7, Vista, and 8. Also, you will find it on Windows 10. Now, let’s see how you can use this tool to take screenshots on your Gateway laptop.
Steps to Follow
- Go to the search box next to the Start icon and type in Snipping tool on the search box.
- Next, click on the ‘Snipping Tool’ app from the search result.
- Next, the ‘Snipping Tool’ will be launched.
- Now, you can click on the ‘Mode’ option from the top to customize the type of the screenshot.
- You can also set a delay time by clicking on the ‘Delay’ option. For more customization options, you can click on the ‘Options’ from the top right corner of the screen.
- After you have set everything up, you need to go to the screen of which you will take a screenshot of.
- Then, click on the ‘New’ option and you will see a ‘+’ icon on the screen and the screen is faded. You can click and hold on to your mouse button and select the area of which you want to screenshot.
- Once you have let go of the mouse button, you will see a new window with the screenshot that has appeared on the screen.
- Now, you can edit this screenshot to your liking.
- After that, you need to save this screenshot to your preferred folder.
Method #4 The Snip & Sketch
As we have said that the Snipping Tool is going to be replaced by another tool in the future in Windows 10. And, that tool is the ‘Snip & Sketch’ tool. Right now, this tool is only available on Windows 10.
And, you can easily take and edit screenshots with this tool on your Gateway Windows 10 PC or laptops. Here’s how to do that…
Step to Follow
- There are 2 ways to activate the ‘Snip & Sketch’ tool. First of all, you can simply press the ‘Windows + SHIFT + S’ keys on your keyboard at the same time. Or you can also search for ‘Snip & Sketch’ on the search box next to the Start icon from the bottom left corner of the screen
- Now, once the ‘Snip & Sketch’ tool is activated, you will see a few options to select at the top of the screen. You can select between the rectangular, free-form, window, or full-screen capture option.
- So, select the option you prefer and take the screenshot by selecting the area by your mouse.
- Next, you will see a popup notification at the bottom right corner of the screen. So tap on it.
- At this point, a window will appear with the screenshot. You can edit that screenshot there
- After you have edited it, you need to save it.
Method #5 Use the Game Bar Feature
Windows 10 has a new feature for gamers. We are talking about the Game Bar feature. With this, you will be able to take screenshots while you are playing games or running any apps.
There are many options and functionality in the Game Bar feature. Let’s learn how to take a screenshot using the Game Bar feature.
Steps to Follow
- Simply, press the ‘Windows + G’ keys on your keyboard. In doing so, you will see a lot of overlay options will appear on the screen.
- Typically, there will be a ‘Capture’ widget, which will be used to take the screenshot. Now, if you don’t see the Capture widget, then you should click on the ‘Widget Menu’ icon from the top of the screen.
- Next, you will see a few options. From those, options, select the ‘Capture’ option.
- Now, you will see the Capture widget has appeared on the top left corner of the screen.
- So, click on the ‘Take Screenshot’ icon that looks like a camera from the Capture widget.
- Instantly, a full-screen screenshot will be captured.
- All the screenshots taken by the Game Bar will be saved on the ‘Videos > Captures’ folder on your Gateway PC.
- You can also access them directly from the Game Bar by clicking on the ‘Show all captures’ option.
Now, all of this will be possible if the Game Bar is enabled on your PC. However, if it is not enabled, then you can enable it by going to the ‘Game Bar Settings’ page.
To do that, search for ‘Game Bar Controller Settings’ on the Windows 10 search box and click on the search result. Then you need to enable it by toggling on the ‘Enable Xbox Game Bar for things like….’ option. Remember, this method is only available in Windows 10.
Method #6 Screenshot the Active Window Only
If you don’t want to take screenshots of the entire screen, you can use this method. With this method, only the active window’s screenshot will be taken. So, here’s how to do that…
Steps to Follow
- First of all, go to the particular window that you want to screenshot.
- Then press the ‘Alt + PrtScn’ shortcut keys on your keyboard.
- The screenshot of that window will be captured and copied to the clipboard.
- Now, you need to open a photo editing app like Paint or Paint 3D and paste the copied screenshots.
- Next, you can edit it if you want to.
- After that, you will have to save this screenshot to your preferred folder.
Method #7 Using 3rd-party Screenshot Apps
There are a number of popular screenshot and screen recording apps available for Windows out there. So, if you are not satisfied with all the above-mentioned techniques, you can go with 3rd-party software. Now, the market is full of such apps.
Some of them are free, while some are premium. In this section, we will introduce you to some free screenshot software. So that you can take screenshots on your Gateway without any cost. So here we go…
With PicPick, you can do more than capturing screenshots. It can be used for editing, improving, and sharing your screenshots and images. It has a premium version. But with the free version, you will be able to capture screenshots easily. Of course, you will need to download it on your Gateway PC first. Then you can easily take any screenshot you want.
The second one on our list is Greenshot. This is a free and open-source software for taking screenshots. Simply download and install this on your PC. And, you will be able to take and edit screenshots effortlessly on your Gateway PC or laptop for free.
You might have already heard about Lightshot. This is a hugely popular tool for screenshots. And, it is free to use. First of all, you need to install it on your Gateway PC. Then it is a matter of time to take screenshots with Lightshot. To learn how to use Lightshot the best way, you can visit their tutorial page. Lucky for you, it is very easy to use this software.
Final Lines
Sometimes, you need to take a screenshot on your PC or laptop. Taking a screenshot on a smartphone is very easy. Even, you can use 3rd party free apps on your phone to make taking screenshots pretty straightforward.
However, people tend to have problems with taking screenshots on their computers.
But we have shown above that it is very easy to take screenshots on your Gateway laptop or desktop. Better yet, we have shared several methods of doing so.
We believe that this post will help you take screenshots on your Gateway PC very simply from now on. And, you can use any of these methods from above that suit you the most.
And before you go, you can read our post on 25 Facts about Microsoft You Never Knew. Also, if you have enjoyed this post, you can share this with others. And don’t forget to ask us any questions in the comments below!