If you’re setting up a VTech phone to receive voicemail, we’ve got just the information for you.
This post will answer all your questions regarding – how to set voicemail on a VTech phone. If you use a VTech telephone, you might want to set an outgoing message on your phone.
Key Takeaways
- If it’s a new phone, the instruction manual should explain how to set it up
- Dial your number and press the star key when the greeting starts – Set up your passcode, set up your voicemail message
- If you have an answering machine, just click the menu and scroll to the TAM Settings.
For a more in-depth guide, keep reading below for all the options
Voicemail can be a convenient way for people who are often not at home to track important messages.
Not only can it help store messages for quite a while, but it’s best if you want to avoid drawn-out and awkward calls; it enables people to leave a message without beating around the bush or making small talk.
Lucky for you, it is entirely possible to set up a custom voicemail message on VTech phones. However, you know VTech has released several different models of telephones.
How to Set Voicemail on VTech Phones
There are many models of VTech phones out there. And the methods of setting up voicemail on each model would be different. So, explaining the whole process in a single tutorial is hard.
As a result, we will be sharing multiple methods of setting up your voicemail on VTech phones in this post.
The best solution to this issue is to read the instruction manual that came with your telephone set. Many users have already found the correct way to set answering messages on their VTech phones by reading the instruction manual.
If you don’t have access to the instruction manual right now, you can download it from their official website. That way, it will be easier to find the correct solution for your particular VTech phone model faster.
Method #1 The Standard Way to Set Up Your Voicemail
Typically, you will have to use a local telephone provider with your VTech phone. You will also have to subscribe to their voicemail service. There are many telephone providers out there. However, here we will be talking about Mediacom.
So, if you are using the service of Mediacom and VTech phones at the same time, then you can follow the steps described below to set up your voicemail.
Steps to Follow
- Dial your phone number and press ‘*’ when the system greeting starts
- Set up your passcode by following the audio prompts (4 to 10 characters)
- Set up your voicemail greeting by choosing from the following options:
- System greeting
- Voice signature
- Temporary greeting
- Personal greeting
- Personal greetings should be under 30 seconds
- At the main menu, choose option 3 (‘Change your personal options’)
- Choose option 3 again (‘Record Greeting’)
- Choose ‘Personal Greeting’ (option 1)
- Record your greeting and press ‘#’ to finish
- Press ‘1’ if satisfied or ‘2’ to listen again
- Press ‘3’ to re-record, and ‘*’ or ‘0’ to exit the menu
That is it. Now that you have set up voicemail on your VTech phone, how do you access it? Let’s learn the system of accessing voicemail on your touch-tone phone.
Steps to Accessing Voicemail
- Dial your own number and press * during the outgoing greeting.
- Enter your passcode to access your voice mailbox.
- A voice mailbox will hold up to 30 messages for 30 days.
- To listen to a message, press 1. New or skipped messages will play.
- If there are no messages, you will be notified and returned to the main menu.
- To reply to a message, press 2 or 4.
- To save a message, press 9. To delete a message, press 7. To skip a message, press #.
- If you accidentally deleted a message, press * to recover it.
Congratulations! You have now set up your voicemail on your new VTech phone. This is only one method.
And it might work on your particular model of VTech phone. Let’s proceed to the next method if that is the case.
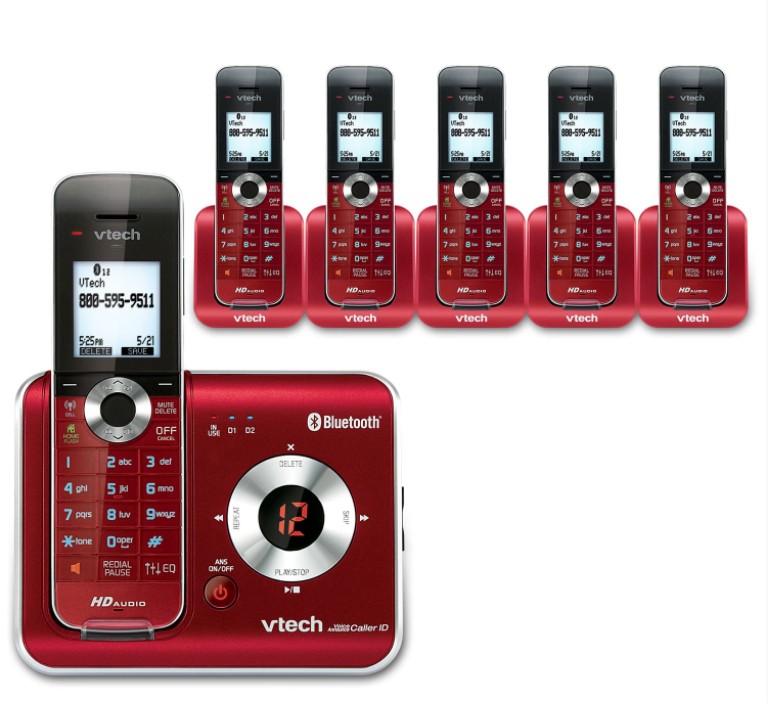
Method #2 The Announcement Feature – If You Have An Answering Machine
In this section, we will talk about the ‘Announcement’ feature on many VTech phones. The ‘Announcement’ is the same message a caller hears first when the answering machine receives the call for your information.

By default, every VTech phone comes with a pre-recorded announcement. But you can record your own. And this will be your voicemail message. So, let’s see how to do this.
Steps to Follow to Record New Announcement
- Press the Menu or OK button when the phone is not in use.
- Scroll down using the up and down arrow buttons and select the ‘Ans-machine’ option by pressing Ok or Menu.
- Scroll down and select ‘TAM Settings.’
- Select ‘OGM Settings’ from the next menu. If you don’t find it, use the arrow buttons to scroll down.
- Choose between ‘ANS & REC’ or ‘Answer only.’
- Press the OK/Menu button and use the arrow buttons to scroll down to the ‘Record Mess’ option.
- Press OK/Menu to start recording. ‘Recording’ will appear on display.
- Speak and record your message.
- Press Ok or Menu to save the recording.
So, you’ve recorded your new voicemail. Now, it is your turn to listen to the announcement you have just recorded. Here’s how…
Steps to Follow to Play the Announcement
- Press the Menu or OK button on the phone when not in use.
- Scroll down using the arrow buttons and select the ‘ANS. Machine’ option by pressing OK or Menu.
- Scroll down and select ‘TAM Settings.’
- Scroll to ‘OGM Settings’ and select it.
- Press the arrow buttons to choose ‘Ans & Rec’ or ‘Answer Only’ option.
- Press OK or Menu twice and the VTech will start playing the announcement.
- The display will show the ‘Playing OGM’ notification.
Method #3 If You Use a Local Telephone Provider
As we mentioned above, you use a service provider with your VTech phone. If you subscribe to their voice mail service, they will provide you a passcode and an access number. They will also tell you how to use it. Unfortunately, on many occasions, some companies don’t offer an instruction manual.
Many users need help with what to do with those access numbers and passcode. But don’t worry; we have got your back. This section will show you how to use those codes and numbers to set up your voicemail on VTech phones.
Steps to Follow
- Press the Menu/OK/Select button on your VTech phone
- Select the ‘Voicemail Setup’ option using the up/down arrow buttons and press the ‘Menu/OK/Select’ button to confirm
- Scroll down to find the ‘Access Number’ option and select it by pressing the Menu/OK/Select button
- Enter the access number provided by your telephone service provider and press the Menu/Select button to confirm
- Dial your own phone number using the ‘Voice Mail’ button on your telephone
- Follow the prompts provided by your telephone service provider to set up your voicemail according to your preferences.
Method #4 How to Set up Voicemail on Your VTech 5.8 Telephone
This section will discuss how to set up voicemail on your VTech 5.8 telephone. Interestingly, this is a standard method of setting up voicemail on a VTech phone. So, you can try this method even if you don’t have the VTech 5.8 model telephone.
Steps to Follow
- Set up the answering machine that came with your VTech phone.
- Press the ‘Answer On/Off’ button at the bottom of the main phone.
- Press the ‘Setup’ button.
- Use the up/down arrows to navigate to set the number of rings before the answering machine receives the call.
- Press the Menu/OK/Select button on the phone to select an option.
- Press the ‘Announce’ key on the VTech phone, which will play the system greeting.
- To record a new voicemail greeting, select the ‘Record’ option.
Final Words
Understanding how to set up voicemail on your VTech phone is an essential part of optimizing its functionality. While some phone providers offer assistance in configuring your voicemail, it’s not rare when users resort to self setup.
This is precisely why we have compiled several comprehensive methods to guide you through the voicemail setup process on your VTech phone. By following our guide, we have no doubt you can seamlessly configure your voicemail and enhance your user experience.
Frequently Asked Questions
This might sound like a standard solution, but before you try anything else, ensure that your device setup is connected to a power source and that the emergency batteries haven’t died out.
You also need to check if your answering devices are connected to a functional telephone jack. You can also try removing and reattaching the wire to the telephone jack.
Next, configure your settings. Sometimes your answering device will be set to an “announce only” setting. This means your device will play the greeting you’ve set up but not record your messages, which defeats the purpose!
You might need to reconfigure your voicemail settings too. Ensure your voicemail lets the phone ring at least twice before it switches to voicemail. Otherwise, it’s possible your calls are going directly to voicemail.
We also recommend frequently deleting old messages that aren’t of importance to you. Sometimes the answering machine might not have more capacity to record, and you could lose out on important messages.
The standard range of a V tech phone is around 2300 feet. This means you can take a call anywhere in your house, even in the garage or the yards, as long as the area falls within the range.
You can find the model of your phone as well as the serial number at the bottom of your telephone, at its base. Sometimes the tag gets scratched up.
In that case, your receipts or the phone’s box can be helpful.