If you don’t know how to uninstall Apache, this article will help you. in this post, we will be sharing multiple ways of uninstalling the Apache Service.
Quick Solution:
- In Windows – click the Start button and then Control Panel. Now click Uninstall a Program under Programs and choose Apache
- Using CMD – Run CMD as Admin on your computer and enter this command: cd C:\Program Files\Apache Group\Apache2\bin in the CMD ( Change the folder path based on where you installed Apache )
- Now run httpd.exe -k uninstall’ (without the quotes) and press Enter
Below is a more detailed guide on how to remove Apache from your computer based on if you want to do it on Windows, the CMD command and more.
How to Remove Apache
1. Uninstall A Program in Windows
The first method is the most common way you can uninstall any programs on Windows PC. So, first, you should try this method.
For Windows 7
Steps to Follow
- Click on the ‘Start’ button and click on the ‘Control Panel’ option from the Start menu
- In doing so, you will be taken to the ‘Control Panel’ of Windows 7. Simply, click on the ‘Uninstall a program’ option from under the ‘Programs’ section
- Next, you will find a list of all the installed programs on your computer
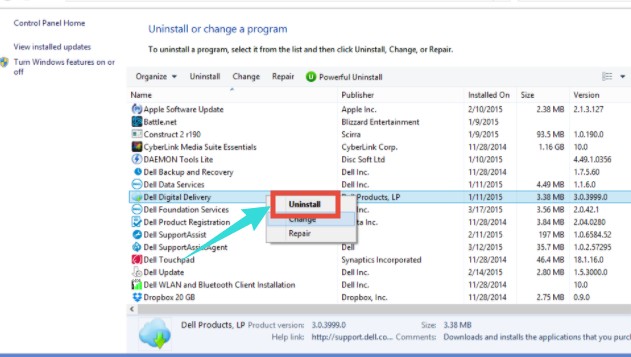
- So, right-click on the ‘Apache’ program and click on the ‘Uninstall’ option from the overlay menu
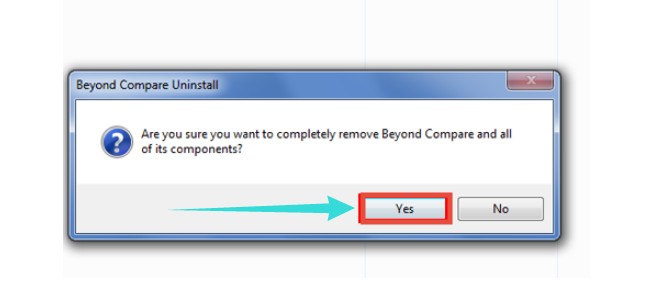
- Next, a new popup window will appear asking if you are sure to uninstall the program. Simply, click on the ‘Yes’ button
- Now, it is time to wait until Windows uninstalls the program on its own
- After the program is uninstalled, another popup window with the confirmation will appear on the screen. Simply, click on the ‘OK’ button to close it
For Windows 10
Steps to Follow
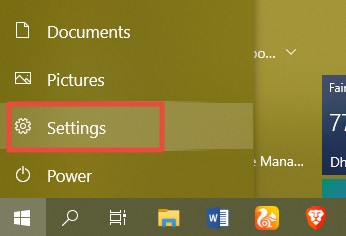
- First, click on the ‘Start’ icon on Windows 10
- Then click on the ‘Settings/Gear’ icon from the ‘Start’ menu
- Now, click on the ‘Apps’ option from the settings menu
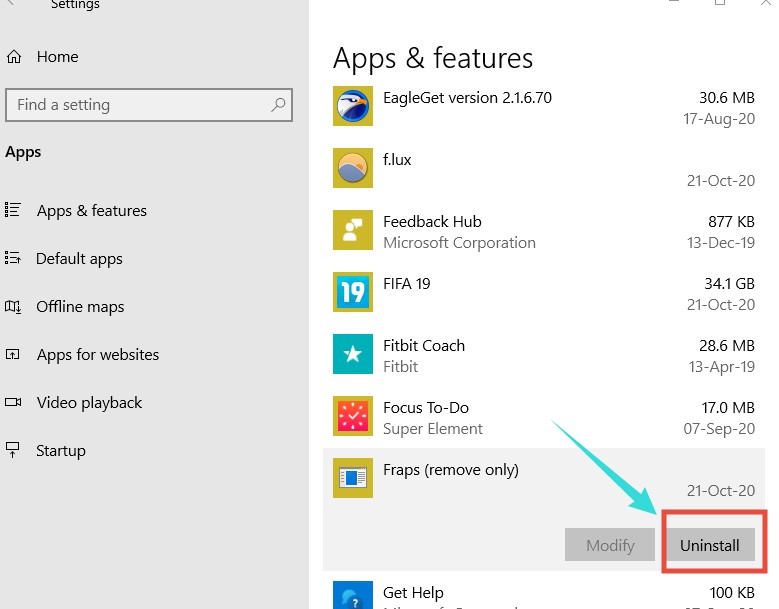
- In doing so, the ‘Apps & features’ window will open with the list of all the apps and programs you have installed on your Windows 10 PC
- Now, find the ‘Apache’ programs from the list and click on it
- Then click on the ‘Uninstall’ option from under the name of the program
- Instantly, a popup notification will appear. Just, click on the ‘Uninstall’ button and the uninstallation process will start automatically
- You might have to click on the ‘Yes’ option when the ‘User Account Control’ notification appears on the screen to proceed with the uninstallation process
- Now, wait for the uninstallation process to finish
2. From the Installation Folder
If you know where you have installed the Apache server initially, then you can try this method. Otherwise, you can skip this one. Typically, every program on Windows comes with an uninstaller application.
And, it will be found in the installation folder of the program. If you find that uninstaller for Apache, you can use this method. Here’s how.
Steps to Follow
- Navigate to the folder where you have installed Apache initially
- Then find the ‘Uninstall.exe’ or any similarly named files
- Next, double-click on that file and follow the on-screen prompts to uninstall Apache from your PC
3. Using Uninstallation Command in CMD
If you were not successful following the methods above, you can try this one. In this method, we will be showing how to uninstall the Apache Windows Service using the CMD. Let’s see
Steps to Follow
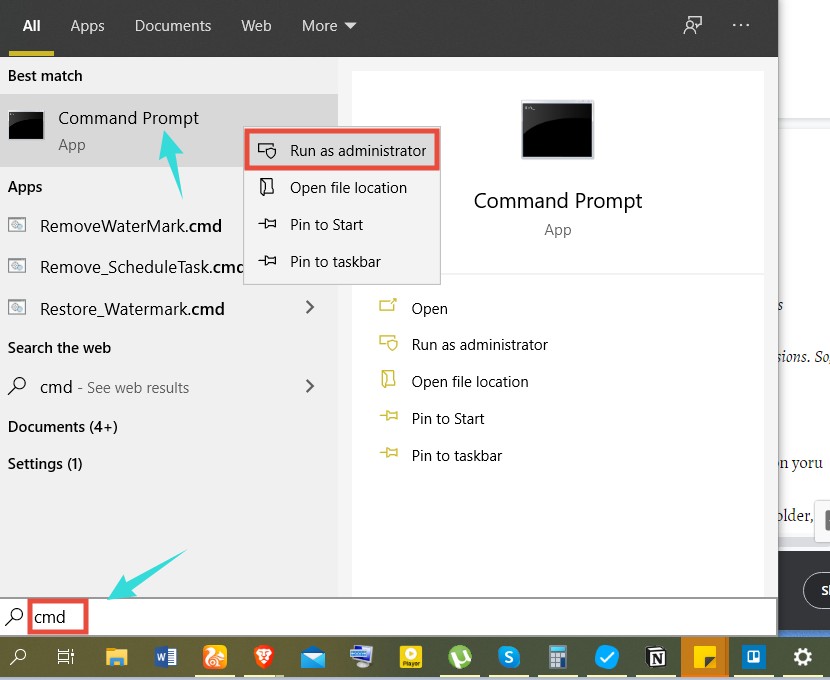
- First, you have to run CMD or Command Prompt as administrator
- To do that, you can search by typing ‘CMD’ on the search box of Windows
- Then right-click on the ‘Command Prompt’ app from the search result and click on the ‘Run as Administrator’ option from the overlay menu
- In doing so, a popup window will appear on the screen asking for the administrative permissions. So, click on the ‘Yes’ button to close this popup window
- Instantly, the CMD will open in the background
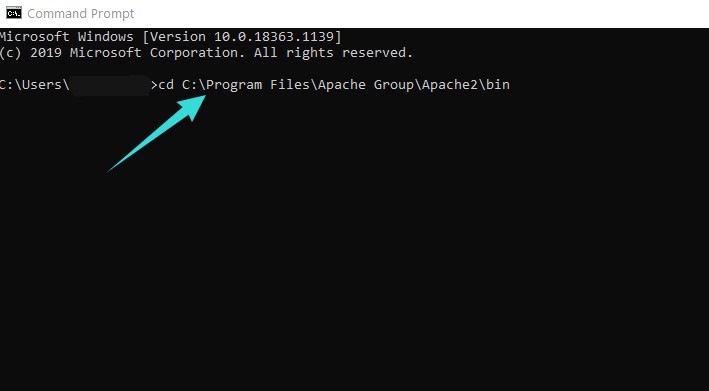
Now that you have opened CMD, you have to cd into the ‘bin’ directory of the Apache program on your computer.
By default, this would be the command you should type in CMD – “C:\Program Files\Apache Group\Apache2\bin”.
However, if you have installed Apache in any other folder, then you should replace the command with the appropriate one. Here’s what you should do next.
- So, type cd C:\Program Files\Apache Group\Apache2\bin in the CMD and press the ‘Enter’ key on your keyboard
- Now, if you want to stop the Apache service, then you can type C:\Program Files\Apache Group\Apache2\bin> net stop apache2.4 ( remember to change the apache version number with the appropriate version you are using ) and press the Enter key on the keyboard
- That means you have to add this command – ‘net stop apache2.4’ ( without the quotes, and change the version number appropriately ) after the Apache installation folder is selected
- After that, you will see messages on cmd saying the apache service has stopped successfully
- Now, if you want to uninstall Apache, you should run this command ‘httpd.exe -k uninstall’ ( without the quotes ) and press the ‘Enter’ key on your keyboard
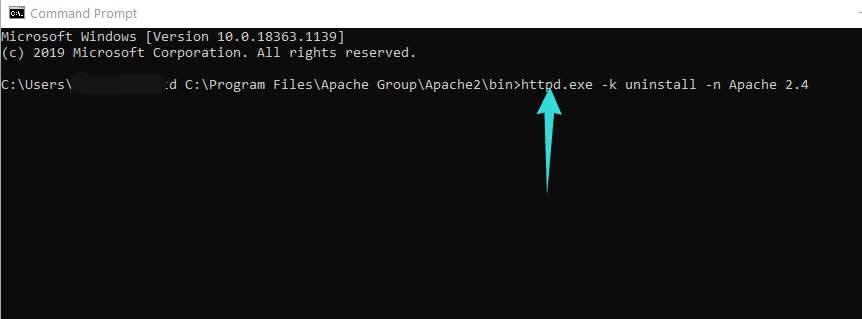
- In doing so, you will see a message saying apache service has been removed successfully
- However, if you have installed apache by any other name than the default one, you might have to change the uninstall command a bit. For instance, if you have installed Apache as ‘Apache 2.4’ In that case, use this command- ‘httpd.exe -k uninstall -n Apache 2.4’ ( without the quotes ) and press the ‘Enter’ key on your keyboard
- Or if you have installed apache as ‘Apache HTTP Server’, then you need to use this command – ‘httpd.exe -k uninstall -n Apache HTTP Server’ (without the quotes). So change the command according to the name of the apache service you are using
- After that, you can delete every files and folder from the installation directory of apache
4. Using the Command Prompt
We will have to use the command prompt or CMD once again in this case as well. However, this time we will use a different command. Let’s see how to do that…
Steps to Follow
- First of all, launch command prompt or cmd as administrator. You can search for ‘cmd’ on the search box in the Start menu. Then you can right-click on the ‘Command Prompt’ app from the search result and click on the ‘Run as administrator’ option
- Then allow the permission to run CMD as administrator by clicking on the ‘Yes’ option from the popup window next
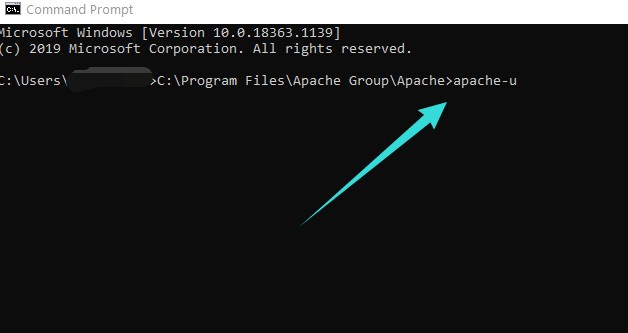
- Now, type in the default installation directory path in CMD and press the ‘Enter’ key on your keyboard. For example, you can type ‘C:\Program Files\Apache Group\Apache’ ( without the quotes ) if that is the installation folder ( By default, it should be the installation folder ). Or else, you have to find the correct installation folder and type it on CMD
- Now, after you have executed the command above, you need to type on ‘apache -u’ (without the quotes) and press the ‘Enter’ key on the keyboard
- It should uninstall the Apache service on your Windows PC
- Now, go to the installation directory of Apache (could be this folder C:\Apache) on your PC and remove or delete everything on there
What is Apache
Apache HTTP Server is one of the world’s most popular web servers available out there.
The best part about Apache is that it is a free and open-source web server. Since the beginning, it has become the most popular and most used HTTP client on the web.
Robert McCool was the main developer of the Apache HTTP Server. It was released back in 1995.
It is compatible with Microsoft Windows, Unix-like, and OpenVMS. Apache was written in C and XML.
Also, Apache HTTP Server supports TLS and SSL protocols. To add to that, Apache provides interfaces for programming languages like Python, PHP, Tell, Perl, etc.
Conclusion
Want it or not, there comes a time, you might need to uninstall the Apache web server from your Windows PC.
Even if you want to reinstall Apache, you need to uninstall the older program in the first place.
As a result, we have provided multiple methods of Apache uninstalling guide HTTP Server as a service from Windows in this post.
As usual, if you are interested in Microsoft Windows, you can read our informative post on 25 tips and tricks you can do on Microsoft Windows right now. And, don’t forget to share this post to help out others with similar issues.