If you want to know how to blur in MS Paint, this post is for you. Microsoft Paint or MS Paint is a well-known image editing app. However, it is not powerful image editing software like Adobe Photoshop, or GIMP, etc.
Quick Solution
- Blur image using the pixelate feature. Open an image and click on the Select option to bring the selection option usually in the shape of a square.
- Now select an area with the square you want to blue/pixelate. Once done click and drag the selection part inward making it smaller. Now click and hold a different corner of the selection area and increase it. You will notice the selected part is pixelated and blurred.
- Use the shape tool and color 1 and color 2 options. Just create a shape in black color or the oil fill color
Still, if you want you can actually use this basic image edition application to a greater extent.
Matter of fact, you can actually blur any part of an image using MS Paint. On top of that, there are multiple ways to accomplish that as well.
Don’t believe us? No problem. By the time you have read this post, you will come to know all the methods of blurring an image or part of an image in MS Paint.
In this article
– Open images in paint
– Blur using pixelate trick
– Alternate pixelate trick
– Shapes brushes method
– Hiding with similar area
– Video
So, let’s get down to business…
Tutorial on How to Blur in MS Paint
In this section, we will be showing you multiple methods of blurring an image in Microsoft Paint. However, before we do that, we will teach you how to open any image on Microsoft Paint.
There are several ways of doing that. And, we will share all the popular ones. So, let’s find out…
How To Open any Images in MS Paint?
- Right-click on the image you want to blur with MS Paint and click on the ‘Edit’ option from the overlay menu
- Next, the image will open in MS Paint automatically
- Go to the ‘Start’ menu on your Windows PC and search for ‘Paint’ in the search box
- Then click on ‘Paint’ from the search results
- You can also open the Paint application directly from the Start menu if it is already available in there
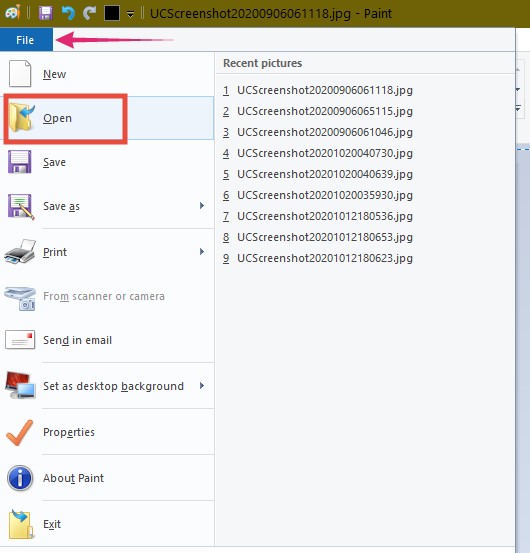
- After the Paint app is launched, click on the ‘File’ option from the top left corner of the window
- In doing so, an overlay menu will appear with a few options. Simply, click on the ‘Open’ option from there
- Alternatively, you can also press the ‘CTRL+O’ keys on the keyboard at the same time
- As a result, a new window will appear. Now, you will be able to browse through the folders and select the image you want to edit in MS Paint in that window
Now that you know how to open an image in MS Paint, let’s proceed to the tutorials below.
Method #1 Blur using the ‘Pixelate’ Trick
The first method we are going to teach is very easy. However, technically, this is not actually blurring the picture. Rather, we will be pixelate(ing) the image.
However, it will have an almost identical effect like blurring the image. So, let’s learn the trick in this step by step tutorial below.
Steps to Follow
- Open the particular image on MS Paint as we have shown above
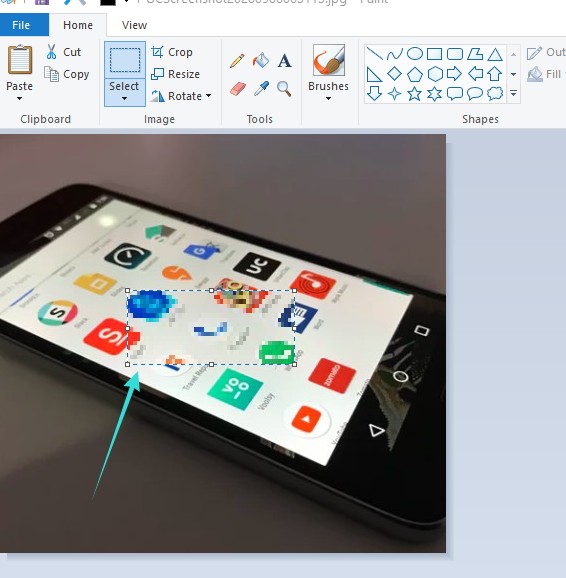
- Now, click on the ‘Select’ icon from the top menu bar. It will select the ‘Rectangular Selection’ by default
- At the moment, you will have to draw an outline around the part of the image you want to blur. To draw the outline, you will have to click and hold the mouse pointer on one of the edges of the image and then drag it to the other edge. That way the part of the image will be selected
- Now, click and hold any of the corners of the selection, and then drag it inward until the selection becomes too small
- Once again, click and hold on one edge of the selection (the tiny selection at the moment) and drag it outward to make it bigger. But as you are dragging it outwards, you will notice the part of the image has become distorted. This is as close as you can go to blurring the image
- You can repeat this process as many times as you want with the blurred area as well
- Now, you can click on any other part of the image to complete the process of pixelating/blurring an image in MS Paint
- Lastly, don’t forget to save the image. You can save it as a new image or you can overwrite it with the existing one
Method #2 Alternative ‘Pixelate’ Trick
If the previous method of pixelating was not simple enough for you, don’t worry at all. We are going to share another simple alternative to that method.

Once again, this method will also pixelate the image, not blur it completely. However, it works almost like the previous method but it is easier than the previous method. So, here we go…
Steps to Follow
- Open the image you need to blur in MS Paint as usual
- Now, click on the ‘Select’ icon from the top menu bar
- Next, select the area of the image you want to blur using your mouse
- After you have selected the area, a rectangular area with a border will appear on the image. You should right-click on the selection area and an overlay menu will appear
- Simply, click on the ‘Resize’ option from the overlay menu. Alternatively, you can also click on the ‘Resize’ option from the top menu bar
- In doing so, a new window named ‘Resize and Skew’ will appear
- Click on the ‘Pixels’ option on that popup window
- And, enter a very low number in the ‘Horizontal’ box. Typically, entering 5 would be good enough in the Horizontal pixels box
- After entering the value, press the ‘Enter’ key on your keyboard
- In doing so, you will see that the selection area has become very smaller. Now, click and drag on the corner of the selection area and drag it outward like it was before
- Right away, the selection area will be blurred or pixelated
- Lastly, you have to save the edited image. You can save it as a new image or replace it with the existing one
Method #3 Using ‘Shapes’ and ‘Brushes’
Now, if you don’t like the previous methods or you don’t want to pixelate the image, then you can check this method out.
In this method, we will not be using any pixelation trick at all. Rather, we will be using the ‘Shapes’ and ‘Brushes’ options of MS Paint.
You would usually use the shapes and brushes of MS Paint to draw different shapes with different brush strokes.
And, we will show you how to use these tools to blur any part of an image in MS Paint in this section. So, here we go…
Steps to Follow
- Open the image you want to blur using the MS Paint application
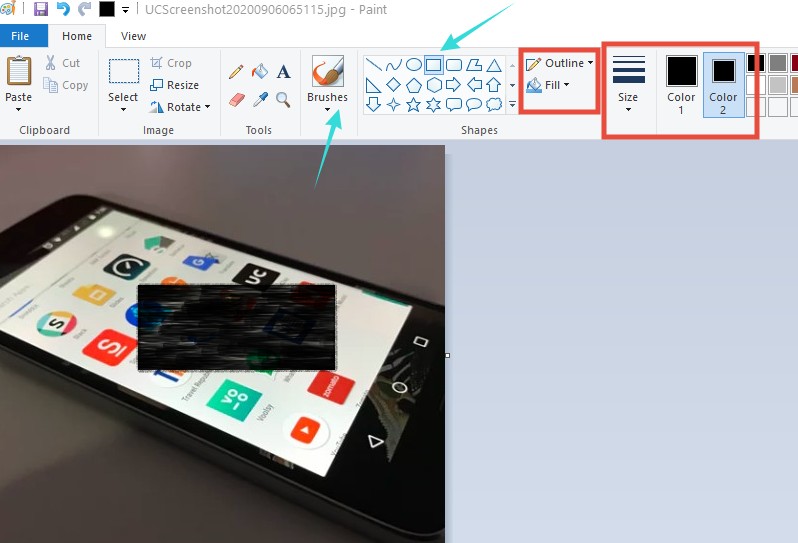
- Now, click on the ‘Color 1’ and ‘Color 2’ options from the top bar respectively, and choose a color of the brush stroke you want to use to blur the image. Typically, the black color would be a good choice
- Next, you can also tweak the size of the brush if you want to by clicking on the ‘Size’ option from the top bar and select your preferred brush size
- Now, click on the ‘Rectangle’ shape or any other shape you prefer from the ‘Shapes’ section from the top bar
- Then, click on the ‘Outline’ and ‘Fill’ option from the top menu and select your preferred option. Normally, for blurring you can select the same option for both the ‘Outline’ and ‘Fill’ option
- For instance, we would usually select ‘Oil’ for both of the options. Also, you can use ‘Solid Color’ for both options as well
- Now, select the particular area of the image that you want to blur out. And you will see that it is getting blurred
- After you are satisfied with the image, you have to save it
Then again, if you are not satisfied with it, you can always press the ‘CTRL+Z’ keys at the same time on the keyboard to undo the edits. You can do it multiple times as well.
Now, you can easily customize both the background and foreground colors, brush size, shape, outline, fill options as usual.
That way, if you are not liking the current blurring effect like the color or the ‘fill’ options, you can easily modify all these options to your liking. And, then select the area to blur.
Method #4 Hiding with Similar Area of the Image
If you want to remove a part of an image without even anyone noticing using MS Paint, you can easily do that.
However, the image should contain similar-looking areas to the part you are going to blur or remove.
This is the best trick on MS Paint if you want to completely remove any texts or smaller objects from an image.
And, the final image will look exactly the same without any edit. So, let’s see how it works…
Steps to Follow
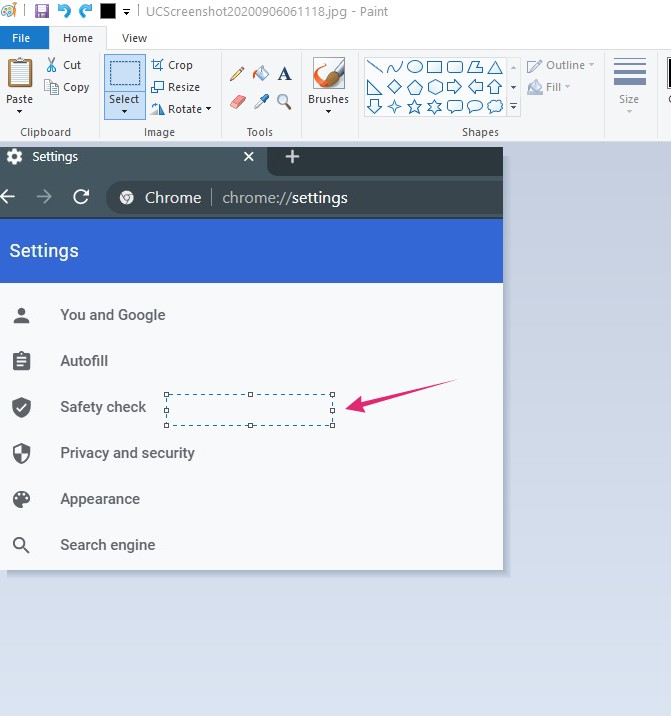
- Open the image that requires modification. For example, we will be editing this image below. And, we will try to remove the word ‘Safety check’ from the image
- First, click on the ‘Select’ option from the top menu
- Now, select a portion of the image that is similar in color to the background of the text ‘Safety check‘. In this case, we can select any portion of the image that is white color as the background of the text is also white
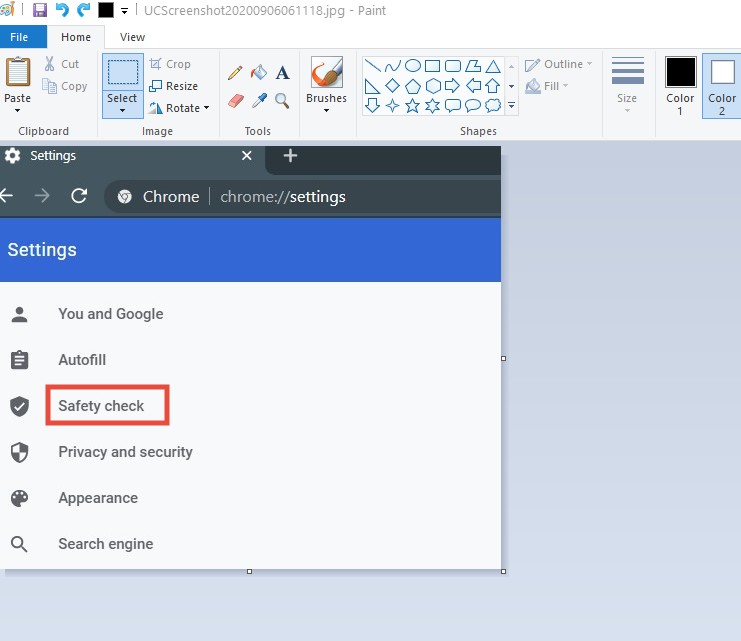
- So, we will select the portion which is at the right side of the text by dragging the mouse pointer a bit. In doing so, a new selection area with a border will appear
- Simply, drag the selection area over the text ‘Safety Check’ and the text will be covered by the white selection area
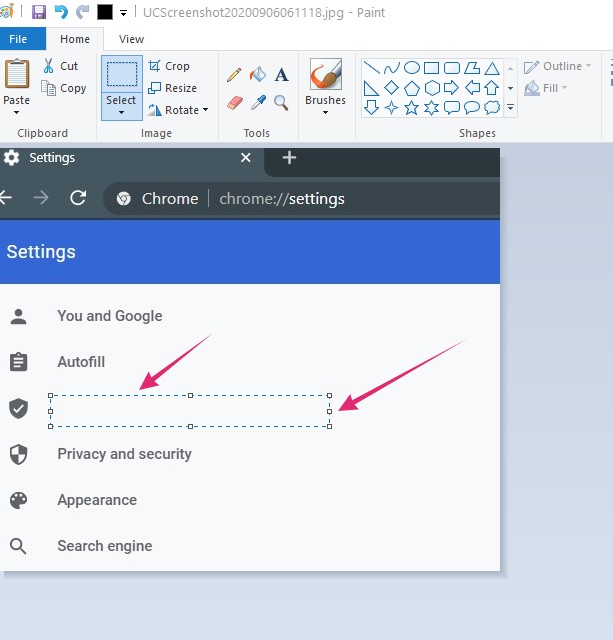
- Now, you can click on anywhere on the image to finalize the edit
- As always, you have to save the image as a new one or replace it with the existing one
In this process, you have to make sure that you are selecting an area that matches the background of the part you are going to remove.
Also, you can determine the length, height, and position of the area you are selecting by clicking, holding, or dragging the mouse pointer over the borders of the selection area.
Hide any Part of an Image in MS Paint
- After you have opened the image, you have to click on the ‘Select’ option from the top menu
- Now, select an area that matches the background of the text or object you are going to remove from the image
- After you have made the selection, right-click inside the border of the selected area. In doing so, an overlay menu will appear. You need to click on the ‘Copy’ option from there
- Or else, you can simply press the ‘CTRL+C’ keys on the keyboard simultaneously as soon as you have made the selection
- The two steps above will result in the same outcome that is to copy the selected area to the clipboard
- After that, just press the ‘CTRL+V’ or right-click over the image and click on the ‘Paste’ option from the overlay menu
- In doing so, the selection area will be pasted to the top left corner of the screen
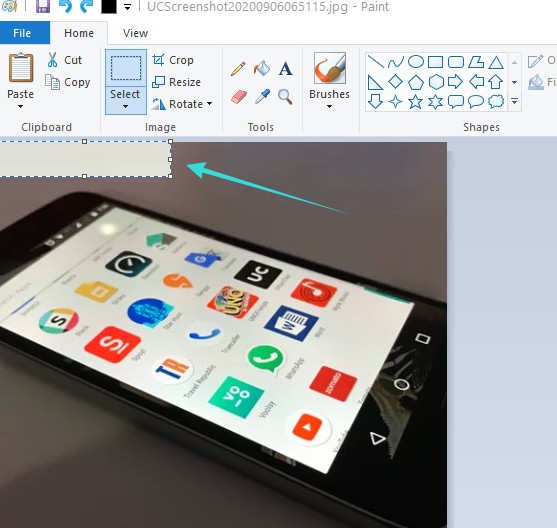
- Now, if you take the mouse pointer inside the border of the pasted selection area, you will see that you can drag it by pressing and holding the mouse cursor over the selected area
- So, drag the area over the text or object you want to hide or remove. You can also change the size of the area by taking the mouse cursor at the edges of the selection area and dragging it
- Once the text or object is fully hidden or removed, You can click on any other part of the image, then the edit will be finalized
- Lastly, you have to save the image as usual
A short video version of this article
Final Thoughts
Microsoft Paint might seem like a basic app for image editing. But it packs a lot of hidden features.
You just have to be a little creative to bring out all these lesser-known functions and utilize MS Paint to its highest.
Microsoft hasn’t included the MS Paint app in Windows 10. Because they have introduced the all-new MS Paint 3D.
However, there are workarounds to this, and you can easily install MS Paint on your Windows 10 PC as well.
But how do you do that? Just, search the web and you will find a lot of resources on this topic. We hope this post was helpful.
If you have liked this post, then you must love our post on 25 cool things to do on Microsoft Paint. Don’t forget to give it a read and share this post.