Did you know that VBA or VisualBoyAdvance has controller support? But how to change controls on VisualBoyAdvance? If this is your question, then we have got your back.
VisualBoyAdvance is a free emulator for playing Gameboy and Gameboy Advance games. If you are nostalgic about those legendary games, then you can easily play those games with this emulator on your PC.
Now, a lot of people seem to have trouble setting up new controllers with VBA. But in reality, it is very easy to set up any controller with this emulator.
As a result, we have come up with a detailed guide on changing the controls on VisualBoyAdvance. And we are going to share the tips with you in this post.
So, let’s dive right in…
VisualBoy Advance Controls
Before You Begin
Typically, you can use any gamepads or game controllers with VBA. However, the gamepad must be recognized, or the driver of the gamepad must be installed on your PC.
Also, you should always plug in the controller at first, even before opening VBA. Only after connecting your controller to your PC successfully, you can open the VBA.
Otherwise, VBA will not recognize your controller. So, you will not be able to change the controls to your liking. So, how do you know that your PC recognizes your controller in the first place?
If it is a plug and play controller, you should simply connect it to the USB port on your PC. Normally, you will hear a notification sound from your PC if the gamepad is detected.
If it is the first time connecting the gamepad, you will see that your PC is installing a few drivers regarding the gamepad automatically.
So, wait for a bit, and you will see a notification saying ‘Your device is ready to use’. That means the controller is set up. And, you can start to use it right away.
Still, if you want to make sure you have connected the gamepad correctly and the computer has detected it, there is a way to confirm it as well. Here’s how…
On Windows 7
- After you have connected the gamepad to your PC, go to the ‘Control Panel’ on Windows.
- Next, click on the ‘Hardware and Sound’ option from there.
- On the next window, scroll down and click on the ‘Game Controllers’ option from there.
- Instantly, a new popup window will appear on your screen. And you will find the list of the connected controllers to your PC and the status. If it says ‘OK’ under the ‘Status’ tab, then the controllers work perfectly.
On Windows 10
You can follow the same steps mentioned above to check your controller’s status on Windows 10.
If you don’t find the ‘Control Panel’ on Windows 10, you can enter ‘Control Panel’ on the search box near the ‘Start’ icon and search for it.
Then the ‘Control Panel’ program shortcut will appear on the search result. From there, you can proceed by following the similar steps explained above.
Now you can proceed to the tutorial section.
What if I want to use my keyboard?
Sure, you can use the default controls of the Visualboyadvance which are the regular keyboard controls as follows:
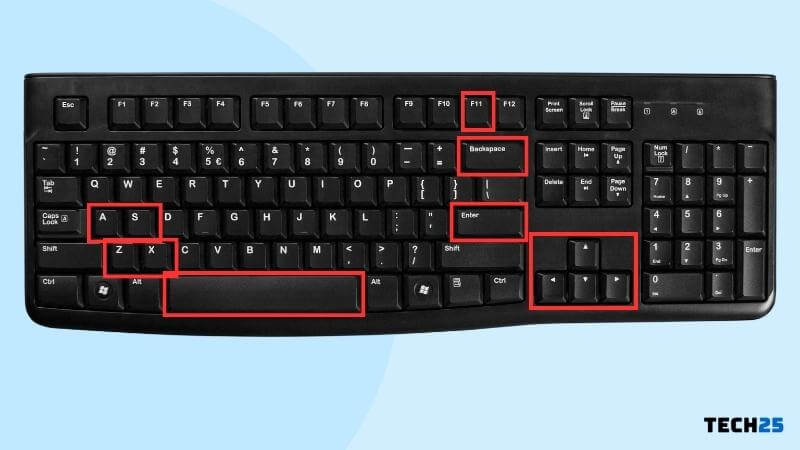
| A | X |
| B | Z |
| L | A |
| R | S |
| Start | Enter |
| Select | Backspace |
| Move arrows | Up,Down,Left,Right |
| Speed up | Space |
| Take Screenshot | F11 |
Method #1 Set up the controls
In this section, we will show you how to change controls on VisualBoyAdvance. This is very easy to follow guide. For your convenience, we will divide this guide into 2 parts. Also, make sure you have a working controller and keyboard plugged into your computer.
For the record, you can use both keyboard and gamepad to play games using VisualBoyAdvance. Also, at once, you can set 4 different controller layouts in VBA. So, here we go…
Part #1 Settings the Default Controller
Typically, you can add up to 4 controllers in VBA. In that case, most of the time, controller number 1 becomes the default controller. Of course, if you want, you can change it to other controllers as well when playing with multiple controllers. So, if you haven’t set up the default controller, first we will show you how to do that.
Steps to Follow
- First of all, if you want to configure a gamepad, you need to plug it before doing anything.
- Next, you should launch the VBA emulator on your PC
- Now, click on the ‘Options’ button from the top menu bar.
- In doing so, a few more options will appear on the overlay menu.
- So hover your mouse pointer over the option ‘Joypad’. And then hover the mouse pointer again over the ‘Default Joypad’ option.
- In doing so, you will see on the right; there are 4 different options. These numbers refer to the chronology of the controllers you have connected to your PC
- So, click on the controller number you want to set as the default gamepad for VBA games. normally, we will use number 1 as the default controller
Part #2 Configuring the Controls
Now that you know how to set up the default joypad, we can proceed to the next part. In this part, we will show you how to change controls on VisualBoyAdvance. So, let’s begin…
Step to Follow
- As always, plug the controller into the computer first. Or, if you want to use your keyboard to play the games, you don’t need to connect any controller.
- Now, open the VisualBoyAdvance on your PC.
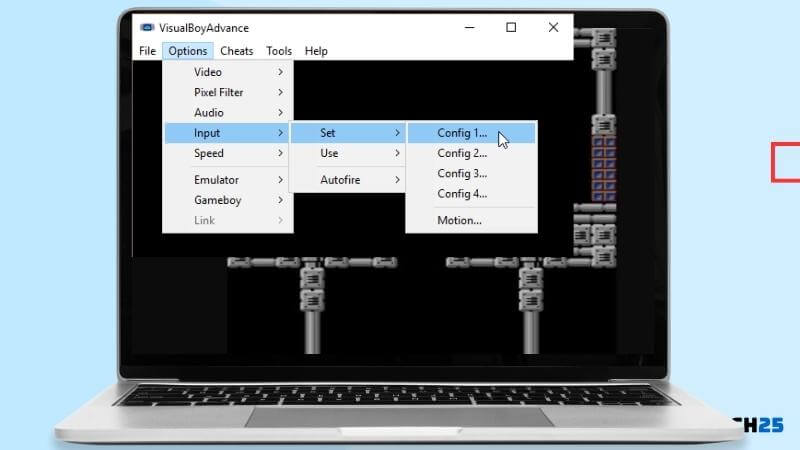
- Next, click on the ‘Options’ option from the top menu bar of the emulator.
- It will bring out a few other options on the overlay menu. So, hover your mouse over the ‘Joypad’ option.
- Then hover your mouse pointer over the ‘Configure’ option.
- Next, hover the mouse pointer over the number of the controller you want to customize. In this case, we will be clicking on the ‘1…’ option to configure the number 1 controller.
- After that, a new window will appear on the screen, where you will see all the buttons available on VBA. And, you can map those buttons to your liking on your controller or keyboard.
- So, click on the box next to each button and press the particular key or button on your keyboard or gamepad to assign the new buttons.
- After you have assigned all the buttons and changed the controls to your liking, click on the ‘OK’ button from the window’s bottom to save the new settings.
That is it. If you have followed the steps above carefully, you have changed the controls on VisualBoyAdvance.
You can usually change controls of up to 4 gamepads/joypads/gaming controllers following this way. However, you will have to customize them one by one, not at once.
Method #2 How to Set up Controllers in VBA-M?
Setting up a controller in VisualBoyAdvance-M is a bit different than VBA. Still, it is very simple like the previous method.
If you are using the VBA-M, you should follow the steps below to change VBA-M controls. Let’s go…
Steps to Follow
- First of all, plug in the controller you want to use to the USB port on your computer.
- Next, launch the VBA-M on your PC.
- Then, click on the ‘Options’ button from the top menu bar.
- Then click on the ‘Input’ option.
- Next, you will have to click on the ‘Configure’ option.
- At this point, you will be able to change the controller settings. So, map the controller buttons according to your choice and save the new settings
See? It was easy! If you follow the method described above, you will be able to use your new controller with old games on VBA-M without any problem.
Final Thoughts
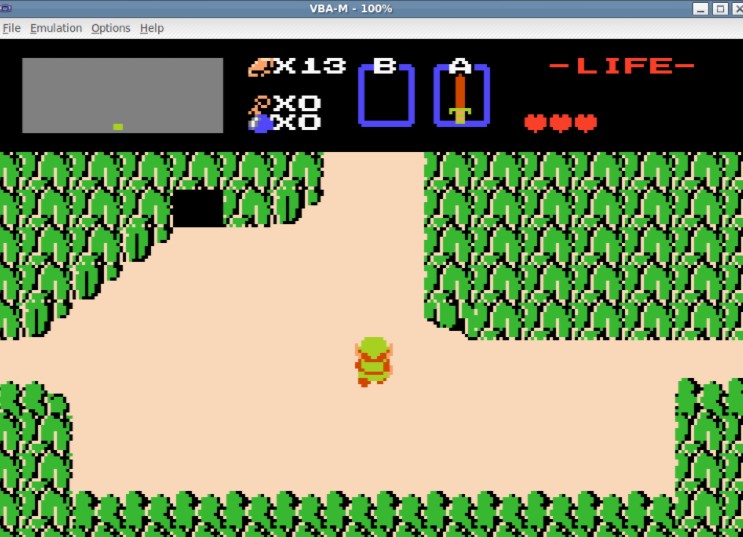
VBA or VisualBoyAdvance is still recognized as one of the best emulators for playing Gameboy games. It was released more than a decade ago.
So, there is a probability that many of you don’t know how to set it up. Or you don’t know how to set up a controller on VBA.
Because of that, we have written this post to help you with changing the controls on VisualBoyAdvance. We hope this post will help you if you want to play your childhood favorite games using your modern Xbox or PS game controllers.
Still, if you have any confusion on this topic, you can leave your comments below.
Before you go, you can check our post on How to Connect a PS3 Controller without USB. It will come in handy if you are using a PS3 controller.
As usual, don’t forget to share this post and let us know your opinions on the comments below!